DAW setup · Updated
How to use a gamepad as a MIDI controller in Bitwig Studio
Short answer
Run PadMap, open Bitwig's Dashboard → Settings → Controllers, click Add, choose Generic → MIDI Keyboard and set its input to the PadMap port. Buttons mapped to notes then play instrument tracks, and you assign a stick or trigger by right-clicking a parameter and choosing Learn Controller Assignment.
Set up your gamepad in Bitwig Studio
- 1
Start PadMap with the pad connected
Connect the controller by USB or Bluetooth and open PadMap. On macOS the port is created for you, as PadMap Out. On Windows PadMap sends through a loopMIDI port called PadMap — here's how to create it. Open PadMap before Bitwig, so the port already exists when Bitwig lists your MIDI devices.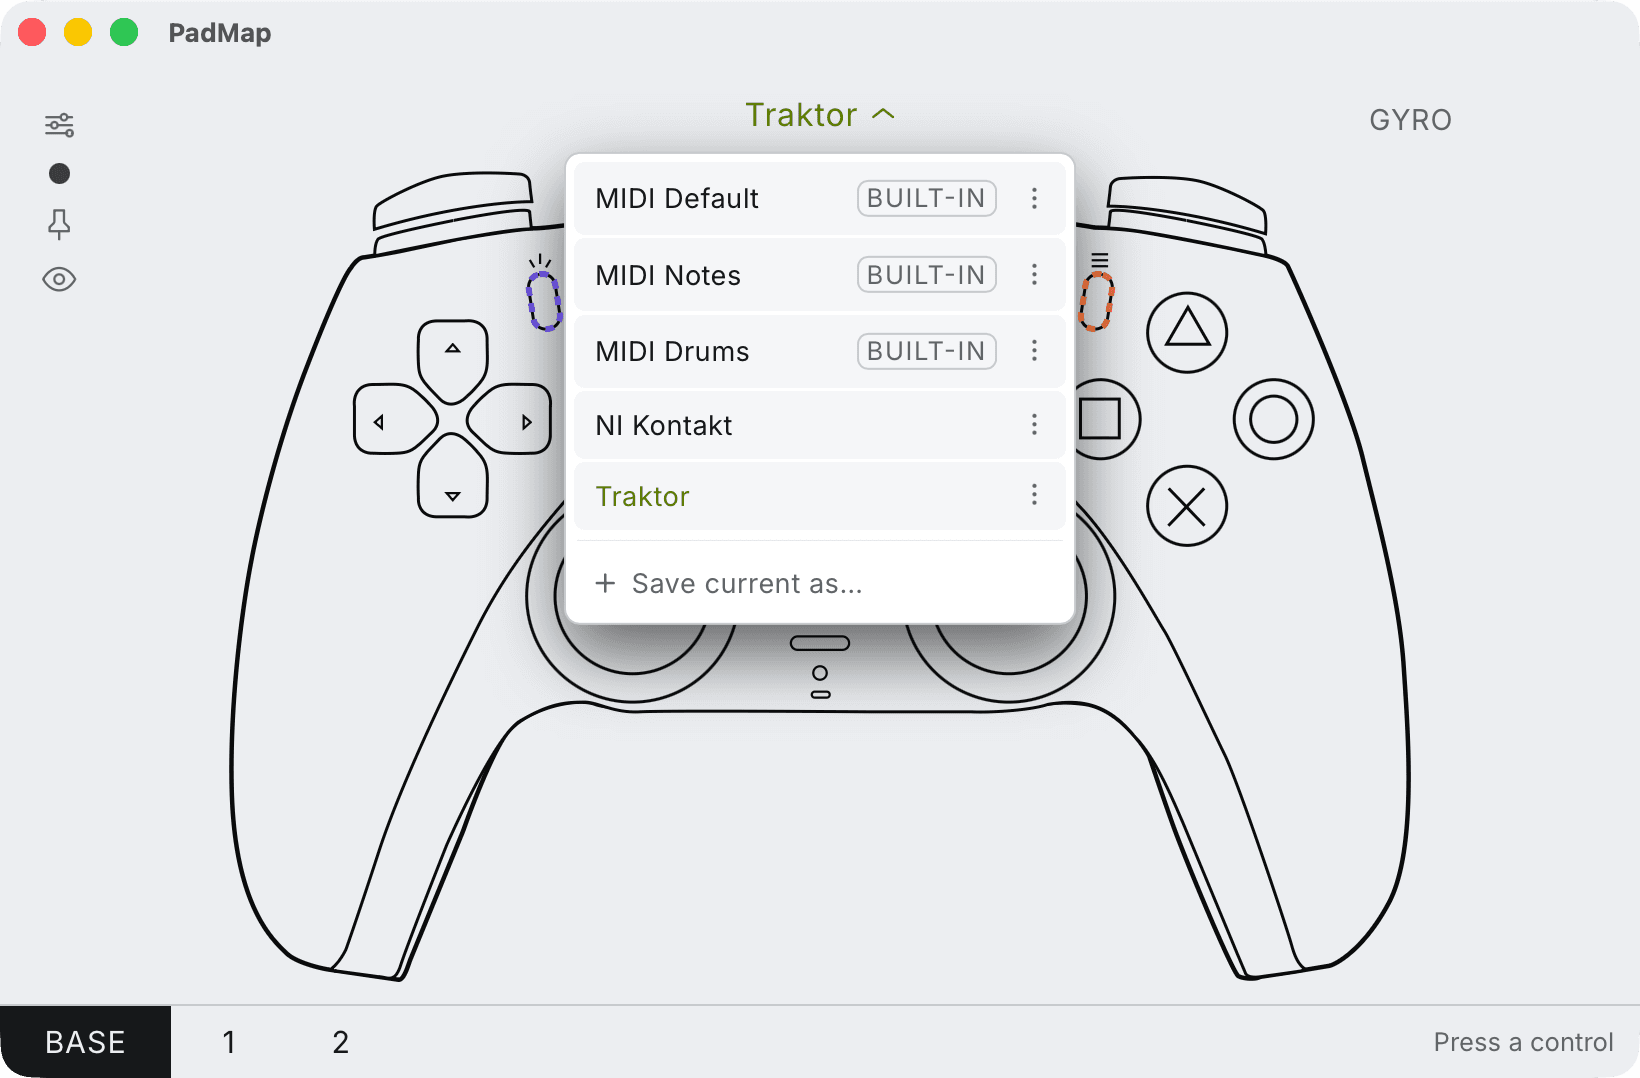
Built-in presets — MIDI Default, Notes and Drums — plus your own, saved with Save current as. - 2
Add PadMap as a generic MIDI keyboard
Click the Bitwig logo in the middle of the window header to open the Dashboard, then go to Settings → Controllers. Bitwig only adds controllers on its own when it has a dedicated script for them, so add this one by hand: click Add, pick Generic at the top of the vendor list, then MIDI Keyboard. In the new entry, set the MIDI input menu on the right to the PadMap port (PadMap Out on macOS). - 3
Play an instrument or a Drum Machine
Create an instrument track, load an instrument or a Drum Machine and select the track. Press a button you've set to a note in PadMap and the track's meter should move. An empty drum chain in Drum Machine shows the note it responds to, so note those down before you load sounds and give your face buttons the same notes in PadMap. - 4
Map sticks and triggers to parameters
Right-click a parameter, choose Learn Controller Assignment… and move the stick or trigger. The parameter is framed in green while it waits, then follows your hand. To map several in a row, open the Mappings Browser Panel with the pointing-hand icon in the window footer: every mappable control turns green, and you click one, move a control, click the next. The same panel lists every mapping so you can edit or delete it later.
What each control is good for in Bitwig
Bitwig rewards mapping a pad to modulators instead of straight to parameters, because one modulator can fan out to many destinations. Here's how the controls line up:
| Control | Works well for |
|---|---|
| Left / right stick | The XY modulator, which Bitwig models on a joystick. Map the stick's two axes to its X and Y, then route each to as many parameters as you like. The stick springs back to centre, so every destination returns to its centre position as soon as you let go. |
| L2 / R2 triggers (LT / RT) | A Macro modulator. A trigger sits at zero until you squeeze it, so one pull can open a filter, raise a reverb send and add drive together, and all of it falls away on release. |
| Face buttons | Notes for Drum Machine chains or an instrument. A spare button can also switch a Button modulator, which flips its targets between two settings. |
| D-pad and shoulder buttons | Commands. In Settings → Shortcuts you can give transport and other commands a MIDI Controller shortcut, which suits buttons you press rather than hold. |
Drive Bitwig's modulators from the pad
Modulators are where a gamepad feels at home in Bitwig. Add one in a device's modulator pane, or on the track itself if it should reach mixer controls such as send levels. Enable its routing button, then click-drag on each target to set how far it moves. Three ways to bring the pad in:
- XY, Macro and Buttons are interface modulators. Map a stick, trigger or button to their controls with Learn Controller Assignment… exactly as you would any other parameter, and the modulator does the fan-out.
- The MIDI modulator reads CC, pressure or pitch bend arriving at the device's input. Because the PadMap controller feeds the track, a stick's CC reaches the device too: set the modulator to the CC number that stick sends in PadMap, and it works without any mapping.
- For the device's Remote Controls, add the controller as Generic → Keyboard + 8 Device Knobs (CC 20-27) instead of MIDI Keyboard, and set eight PadMap controls to CC 20–27. Those eight then follow whichever device you select.
Bitwig quirks worth knowing
- Takeover mode sits at the top of Settings → Controllers. Immediate applies every move at once, which is what a snap-back stick needs. Catch ignores the stick until it reaches the parameter's current value, and Relative scaling nudges the value in the direction you move. The fader icon on the PadMap entry decides whether the global mode applies to it; switched off, it behaves like Immediate.
- Mappings made in the Mappings Browser Panel belong to the project. MIDI shortcuts set in Settings → Shortcuts are global, so put transport buttons there and sound-specific mappings in the project.
- Bitwig Studio runs on Linux, but PadMap doesn't. You need PadMap on Windows 10/11 or macOS, with Bitwig on the same machine.
Layers: more controls than the pad has
PadMap lets you stack mapping layers and turn any control into a modifier that switches between them. In Bitwig that works well split by job: the base layer plays a Drum Machine from the face buttons and runs an XY modulator from the right stick, while holding R1 switches the face buttons to transport shortcuts and sends the stick to a second XY modulator on another track.
Each layer sends its own notes and CCs, so to Bitwig the second layer is simply another set of hardware controls. Learn them with the same right-click, or in the Mappings Browser Panel, while holding the modifier.
Written by Oskar Schachtschneider, who builds PadMap at Sinuslabs.